How to Setup Try Again on a Question Slide
Here's our Step-by-Step Instant Pot Setup Guide to help yous become started! You can unbox & setup your Instant Pot Pressure Cooker in five easy steps.
If you even so oasis't subscribed to our free weekly newsletter, subscribe now for more useful tips and recipes. Link: Subscribe for Costless Recipes & Tips
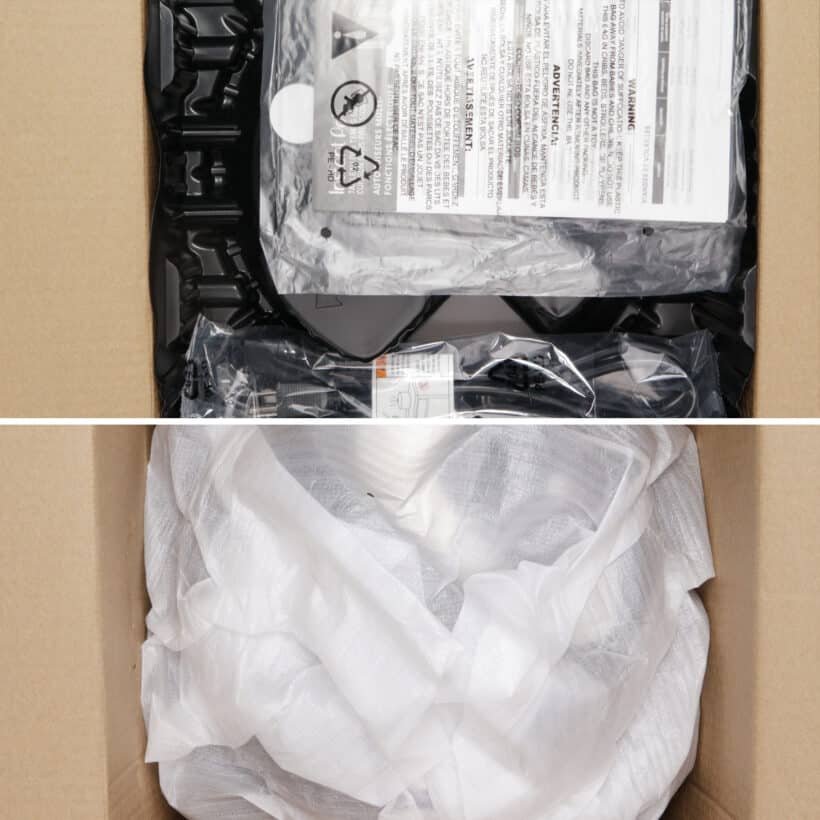
Step 1: Instant Pot Unboxing
The starting time step to setup your Instant Pot – go it out of the box! 🙂
1.one Instant Pot Accessories
Within, you'll find a variety of Instant Pot accessories. Depending on your Instant Pot model or version, it may come with different accessories.
Here are the mutual accessories you'll see.
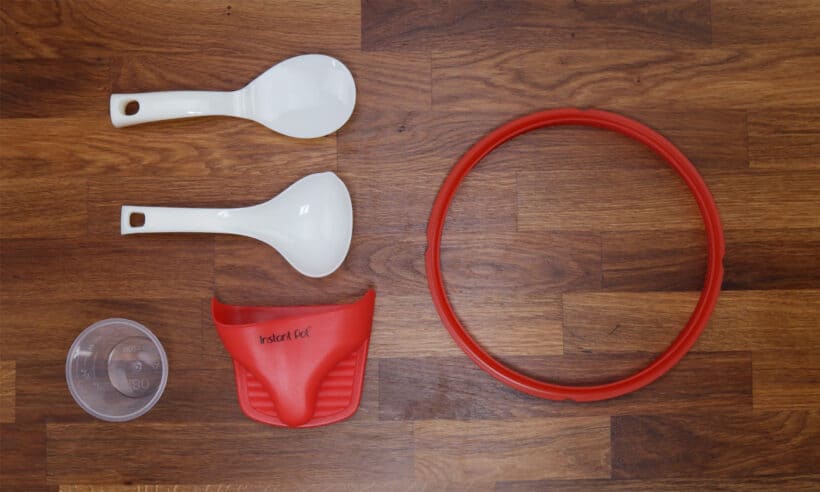
What is the carmine ring in the Instant Pot? It's an extra silicone sealing ring. It's not bad to accept a spare one equally a backup. Since it tends to absorb some of the nutrient olfactory property during the cooking procedure, some users use this red ring when cooking sweets.
1.2 Trivet or Steamer Rack
About all Instant Pots come with a stainless steel steamer rack. Some with handles, others may not take handles. It'southward very helpful for cooking all sorts of food in Instant Pot. 🙂
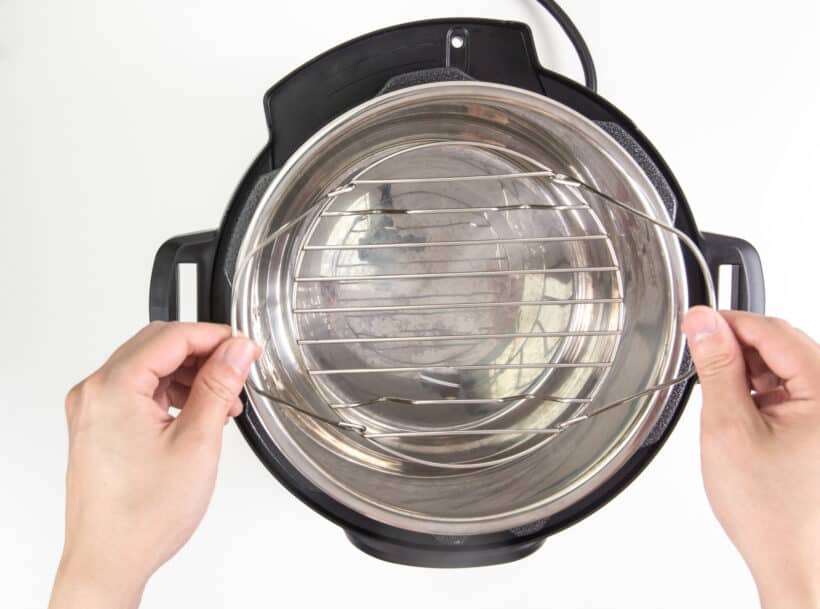
The long handles on both sides make information technology easy for handling and removal from the pot. It's too compact, piece of cake to store, and like shooting fish in a barrel to clean.
More Info on How to use the Trivet: Instant Pot Trivet
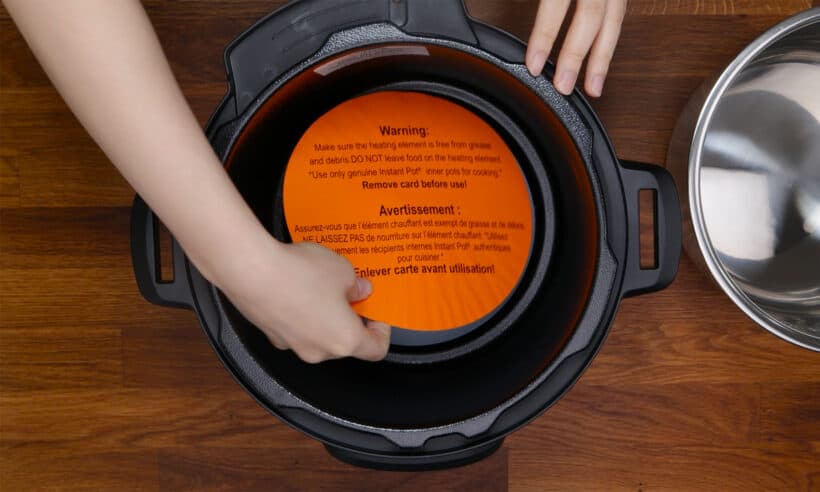
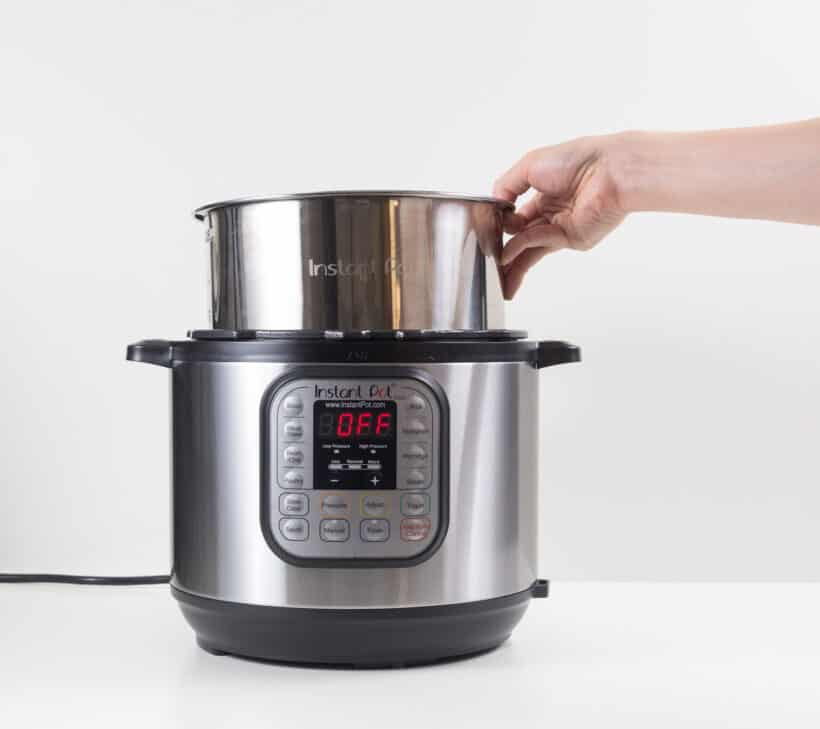
Stride 2: Setup the Inner Pot
Give the inner pot, lid, silicone sealing ring, and accessories a thorough wash with warm soapy water, then dry out thoroughly.
During Instant Pot Setup, don't forget to remove the orange warning card inside the cooker base.
*Caution: never immerse this outer pot in whatsoever type of liquid.
Do you lot demand an extra inner pot? Since each Instant Pot comes with 1 Stainless Steel Inner Pot, some Instant Pot users (including the states) purchase a second Stainless Steel Inner Pot.
We love to take an extra inner pot handy for more flexibility. Sometimes, we directly store the leftovers in the inner pot and place it in the fridge. Other times, we enjoy the flexibility to be able to use our Instant Pot while our bootleg Instant Pot Yogurt is chilling in the fridge within the inner pot.
Where to Buy Inner Pot?
- 3 Quart: Stainless Steel Inner Pot
- 6 Quart: Stainless Steel Inner Pot
- 8 Quart: Stainless Steel Inner Pot
If you prefer a Non-Stick Inner Pot for super easy cleaning: 6 Qt Ceramic Non-Stick Inner Pot is a good pick likewise.
Pace 3: Know & Check Your Instant Pot Lid
3.1 How to Open & Close the Lid
Offset Instant Pot setup skill you need to master is opening & closing the Instant Pot Lid with ease.
Every bit shown in photo below, the black markings on the lid & pot may not be like shooting fish in a barrel to spot at first.
- Markings on hat: "Close – Inverted Triangle – Open"
- Markings on exterior housing:"Locked Triangle – Unlocked Triangle"
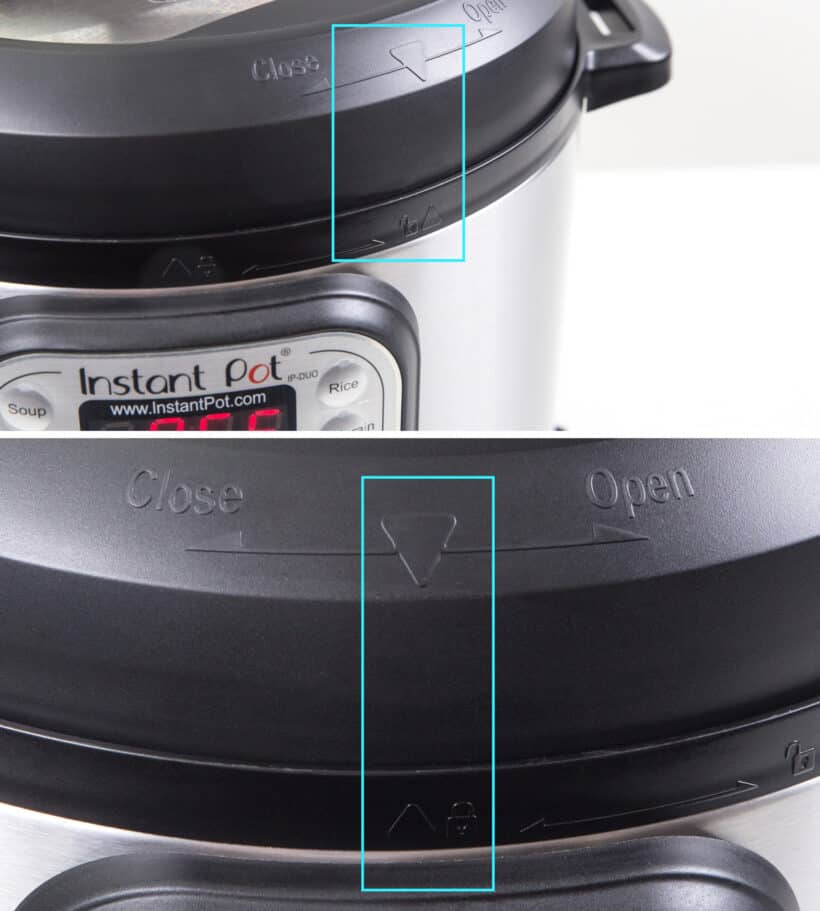
- Open Chapeau (turn right): twist counter clockwise until Inverted Triangle is aligned with the Unlocked Triangle sign, then lift the lid.
- Close Lid (plough left): align the Inverted Triangle with the Unlocked Triangle, so twist clockwise to lock the chapeau.
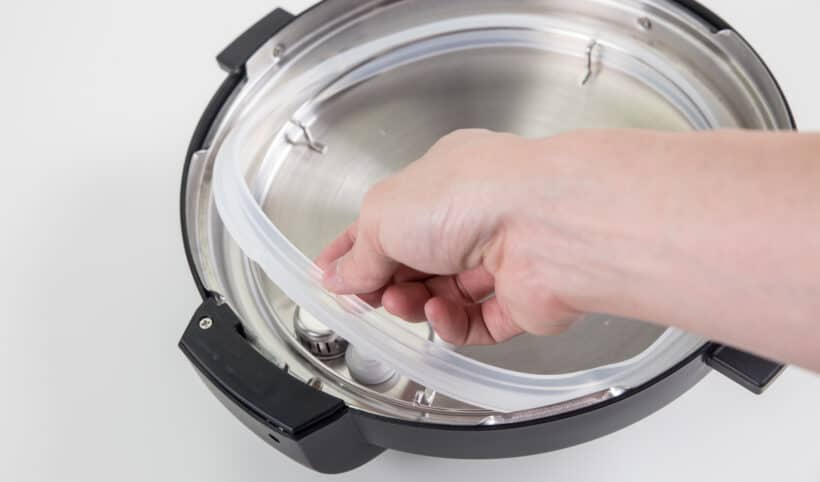
3.ii Cheque Silicone Sealing Band
How to install sealing band on Instant Pot? Put the sealing ring on top of the rack on the Instant Pot chapeau, so gently run your fingers along the ring equally yous push button it into the rack.
It's critical to ensure the silicone sealing ring is seated properly, and at that place isn't anything stuck on the ring or rack.
*Circumspection: Never pull the ring by force as information technology may stretch or damage the ring and affect the sealing function. Don't apply information technology if it has cracks, cuts, or any other damages.
Practice yous need a spare sealing ring? It'due south always good to accept a spare Silicone Sealing Ring considering they practice wear and tear. Plus, the ring may become stinky as it absorbs food odors over fourth dimension. If you like, you lot tin dedicate ane Sealing Band for Savory nutrient, and the other for Sweets.
- 3 Quart: Sealing Ring
- 5 or vi Quart: Sealing Ring
- viii Quart:Sealing Band
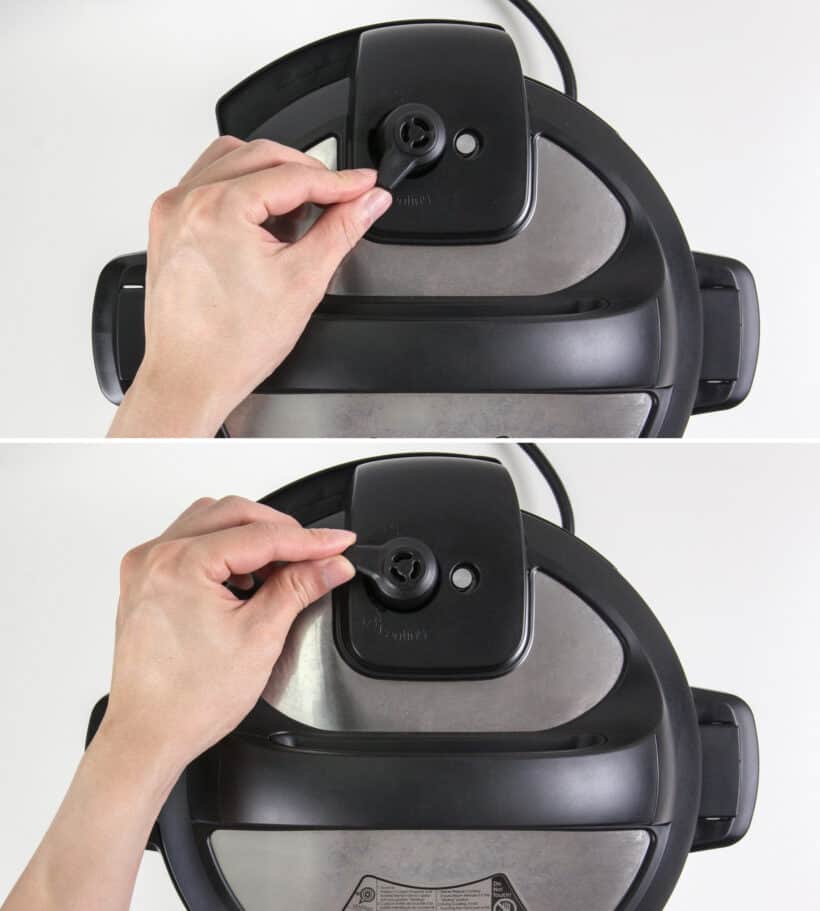
3.3 Cheque Other Parts on Hat
The following three Instant Pot parts are critical for the Instant Pot to function properly. Make sure they're all properly in identify, clean, and articulate of any obstructions during the Instant Pot Setup & every time before using.
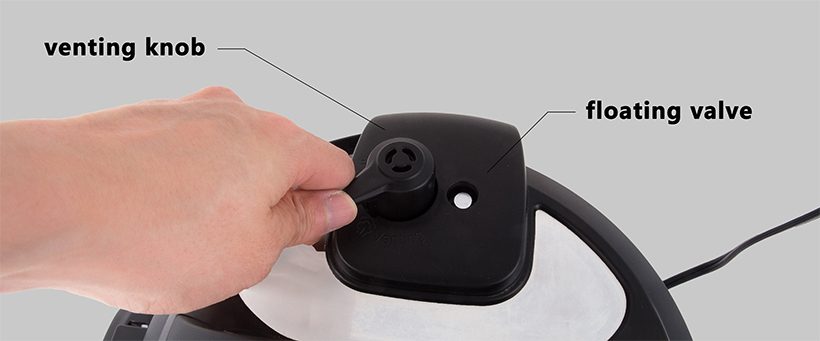
a. Instant Pot Venting Knob (Steam Release Valve) – ensure it's fully attached to the lid and pushed downwards all the way. It's perfectly normal and necessary for it to be loose. You should be able to remove information technology for washing past pulling information technology straight out.
b. Instant Pot Floating Valve – examination & make sure it can easily pop up and downwards (you tin push button information technology from the bottom of the hat).
c. Instant Pot Anti-Block Shield – push it on the side to lift it up (every bit shown in photo below) and press information technology down in position to install information technology back in.
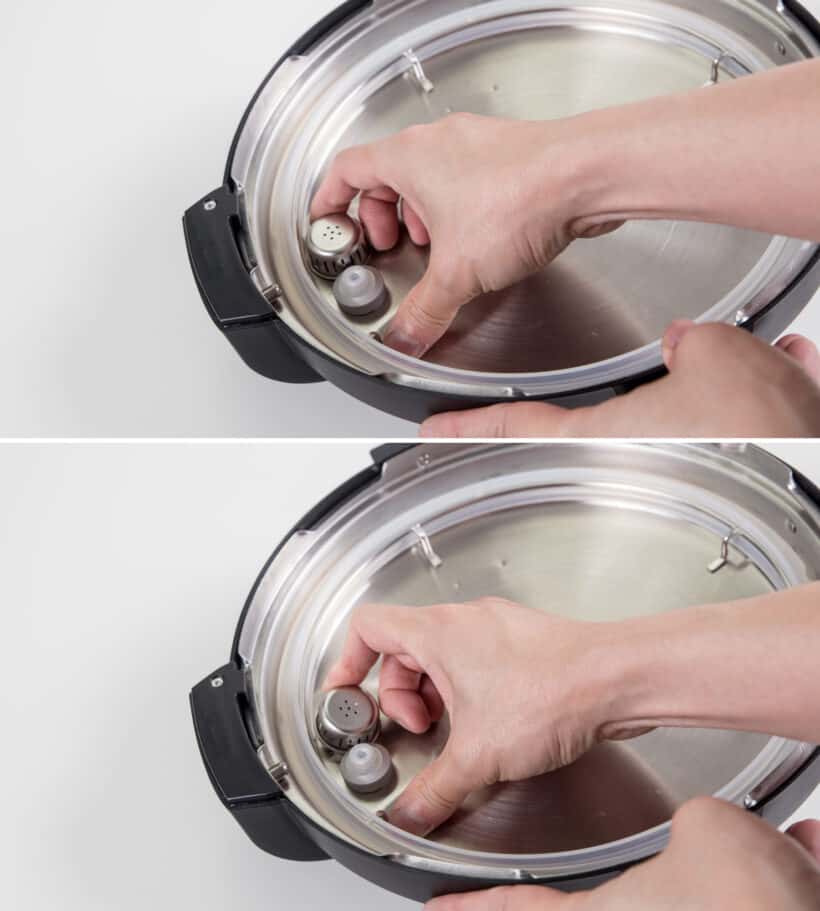
*Pro Tip: there may be times when food or liquid gets stuck on or within the anti-blocking shield. Be certain to remove it and wash it thoroughly from time to time.
Footstep 4: Install Instant Pot Condensation Collector
If your Instant Pot came with 2 plastic cups, the round plastic cup is a Rice Measuring Cup. The apartment plastic loving cup (shown in below photo) is an instant pot condensation collector.
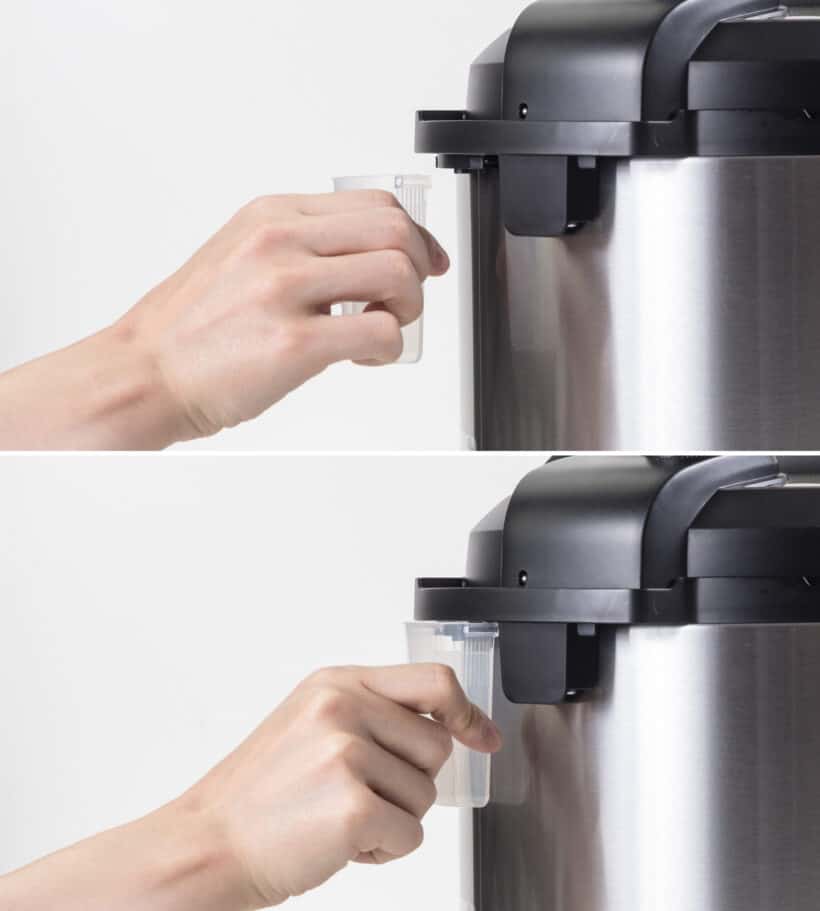
How to Install Instant Pot Condensation Collector? Notice the slot at the dorsum of Instant Pot, then slide it right in (every bit shown in the photo above).
*Pro Tip: be certain to check & rinse the condensation cup once in a while.
Step 5: Plug in Power Cord
Time to plug in and your Instant Pot Setup is complete!
A common problem some new users confront is when the Instant Pot wouldn't turn on, they idea information technology'southward broken, but in fact, it was merely a loose plug with a bad power connection.
Brand sure to plug in the power cord securely and push button it firmly all the way into the cooker base. You should hear a rejoicing *beep* when information technology's powered up. 🙂
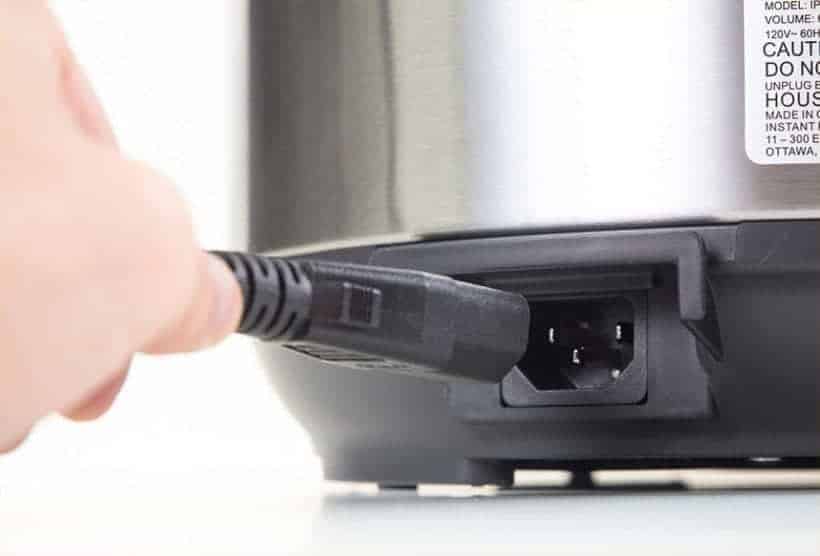
*Annotation: the Instant Pot Ability Cord design varies depending on the Instant Pot model and versions.
Your Instant Pot Setup is done!
Bonus Features
Here are some fun little features available on some of the models & versions.
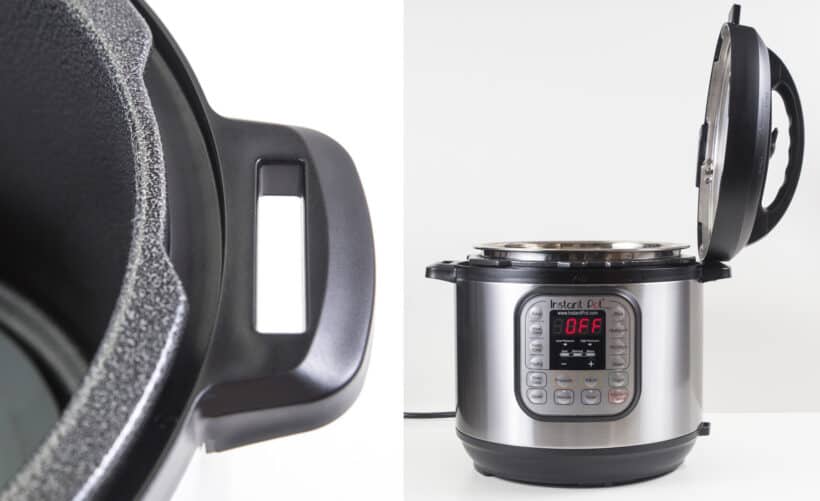
a. Hat Fin
You tin identify your lid into either side of the handles. So, y'all don't take to worry near where to put the lid with condensation when you're taking food out or seasoning the food in the Instant Pot.
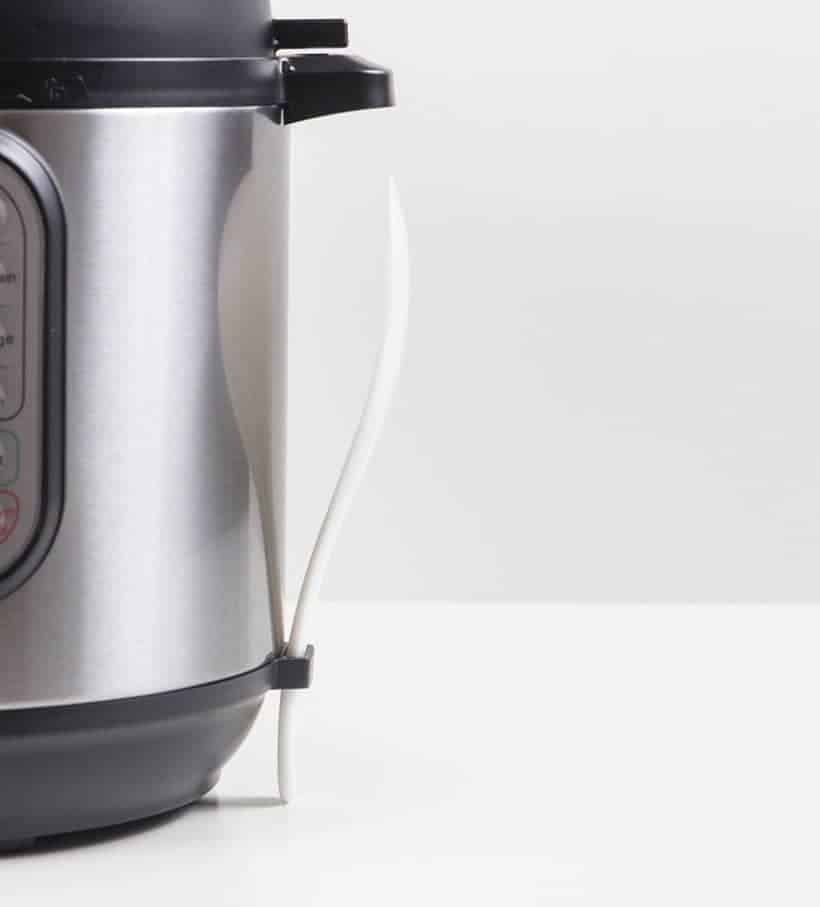
b. Spoon Shelf
*Note: Most new models have removed this snuggle little shelf.
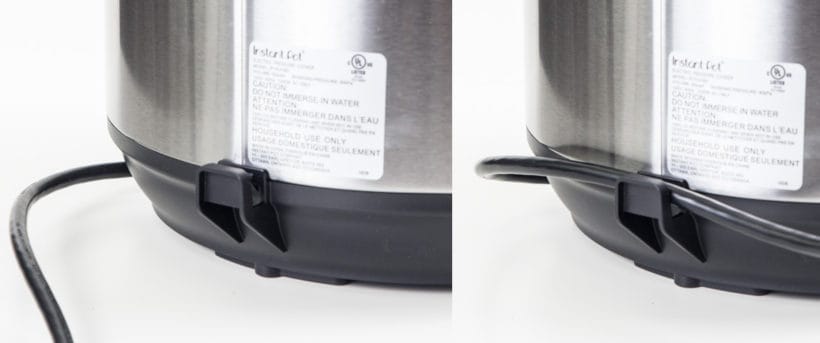
c. Power Cord Holder
Sentinel Instant Pot Setup Video
Next Step: Instant Pot H2o Examination
Some Useful Tips & Resources
50+ Instant Pot Recipes
All Our Force per unit area Cooker Recipes
*Disclosure: We are an Amazon Influencer/Amazon Associate. This means that if you decide to purchase items or services on Amazon through our links on Pressure Cook Recipes to Amazon, Amazon will send a pocket-sized committee to u.s. at no additional costs to you. Thank you lot!
Source: https://www.pressurecookrecipes.com/instant-pot-setup/
0 Response to "How to Setup Try Again on a Question Slide"
Enregistrer un commentaire